
The Ultimate Blueprint for Custom Jacket Upcycling: Prep, Paint, and Seal
The Ultimate Blueprint for Custom Jacket Upcycling: Prep, Paint, and Seal
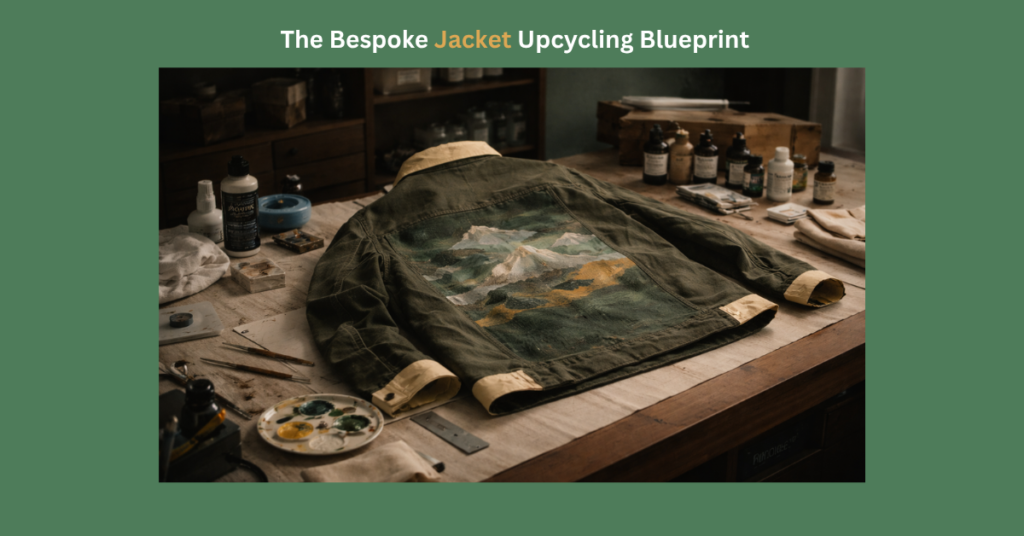
Successful “custom jacket upcycling” requires more than artistic vision; it requires strict adherence to material science, specifically in how garments are prepped, painted, and sealed to ensure the artwork withstands daily wear without cracking or peeling.
A finished project is defined as a fully customized jacket featuring a completed design, properly sealed for weather resistance, and ready to wear daily without flaking, cracking, or peeling. Defining this exact end-state eliminates overwhelm and prevents artists from abandoning half-finished artwork.
The Environmental Imperative
The practice is undeniable. The Ellen MacArthur Foundation reports that 92 million tonnes of textile waste are created annually, resulting in $150 billion lost. Furthermore, the UN Environment Programme notes the fashion industry accounts for 10% of global greenhouse gas emissions. Upcycling is a direct, hands-on intervention against this waste.
Phase 1: Planning and Sourcing Materials for Jacket Upcycling
Before applying any paint, you must lock in your visual design with a mood board and identify the exact base material of your jacket, as 100% Cotton Denim requires vastly different prep supplies than Genuine Leather.
Create a physical or digital mood board. Anchor your visual inspiration here before touching a brush. Next, source your garments from your own closet, local thrift stores, or vintage shops. You must check the inner garment tag for material composition. Verify whether you are working with 100% Cotton Denim, Genuine Leather, or Vegan Leather.
Based on that material, order your mandatory supplies. You need fabric or leather paints, high-quality synthetic brushes, a leather preparer/deglazer, an acrylic finisher, and tailor’s chalk.
| Task | Owner | Due Date | Budget/Cost | Status |
|---|---|---|---|---|
| Source base vintage jacket | [Name] | [Date] | $30.00 | Done |
| Order paints, deglazer, & finisher | [Name] | [Date] | $45.00 | In Progress |
| Prep and clean jacket | [Name] | [Date] | $0.00 | Not Started |
Phase 2: Preparing Denim and Leather Surfaces to Prevent Peeling
Skipping the surface preparation phase guarantees your design will eventually fail; the specific prep method you use must be dictated entirely by whether your canvas is porous denim or sealed leather.
To understand leather prep, you must understand the term “deglazer.” A deglazer is a strong chemical solvent used specifically to strip factory polyurethane finishes, waxes, and oils from leather surfaces.
- Denim Preparation: Wash the jacket thoroughly without any fabric softener. Kao Corporation’s chemical research explains how cationic surfactants in fabric softeners bind to cellulose fibers. This creates a hydrophobic layer that actively blocks acrylic adhesion. After washing and drying, iron the target area flat to properly align the warp and weft of the fabric.
- Leather Preparation: Wipe the jacket clean with a damp cloth to remove surface dirt. Next, aggressively apply a leather preparer/deglazer using a cotton pad. Official Safety Data Sheets highlight why this works. Fiebing’s Deglazer consists of ~50% ethyl acetate, while Angelus Deglazer exceeds 70% acetone. These high-grade solvents forcefully decompose protective factory dyes and clear coats to expose the raw leather pores.
- Universal Masking Step: Apply heavy-duty painter’s tape to aggressively mask off all hardware (buttons, zippers, rivets) and structural seams. This maintains a pristine, professional look and prevents accidental paint transfer.
Phase 3: Executing the Custom Design with Proper Paint Layering
Applying the paint medium requires patience and a specific sequence of thin layers to ensure the final colors pop vibrantly while allowing the fabric to remain flexible during wear.
- Sketching: Map the design directly onto the garment using tailor’s chalk or a washable fabric pencil.
- The Base Coat: Apply a solid white base coat. This step is mandatory for making top-layer colors pop accurately on dark fabrics.
- Drying: Allow the base coat to dry completely. You can use a heat gun or hair dryer on low heat to safely speed up the evaporation process between layers.
- Blocking Colors: Always apply multiple thin layers rather than one thick layer to prevent future cracking. Thick paint sits on top of the fabric; thin layers bind with the fibers.
- Line Work: Finish by painting the fine details, crisp outlines, and delicate line-work using a fine-tipped detail brush.
Phase 4: Sealing the Upcycled Jacket for Weather Resistance
A custom jacket is not truly finished until the painted design is fully cured and chemically or thermally sealed against the elements.
The completely painted design must air dry undisturbed for a minimum of 24 hours before any sealing occurs. Premature sealing traps moisture and ruins the adhesion.
- Denim Sealing (Heat-Setting): Lock in fabric paint via heat-setting. Golden Artist Colors’ guidelines dictate the exact parameters for this. Place a sheet of parchment paper over the dry design and iron it on a medium-high setting (approximately 200°C / 392°F) for 3 to 5 minutes. Keep the iron moving to prevent scorching.
- Leather Sealing (Acrylic Finisher): Leather requires a chemical topcoat. Apply a matte or glossy acrylic finisher using a clean sponge or an airbrush. This creates a flexible, waterproof barrier over the paint.
- Final Touches: Remove all painter’s tape carefully. Inspect the hardware for any paint bleeds, clean them up with a toothpick if necessary, and take high-quality completion photos in natural lighting.
Tracking Progress and Post-Mortem Evaluation
After wearing the jacket in the real world a few times, evaluating the durability and execution of your project through a post-mortem debrief is critical for improving your next build.
Utilize the debrief framework below to honestly assess your technique.
| What Went Well? (Keep doing this) |
What Went Wrong? (Change this) |
What Will We Do Differently Next Time? |
|---|---|---|
| Example: The tailor’s chalk washed out perfectly without leaving any ghost residue. | Example: I didn’t wait long enough between paint layers; minor cracking occurred near the shoulder. | Example: Next time, I will use a heat gun between every single layer and allow a full 48h cure. |
Quick Troubleshooting: Why Custom Jackets Crack and Peel (FAQ)
Anticipating technical roadblocks and maintenance fears is critical for long-term success in the upcycling domain.
Can I wash my painted denim jacket in the washing machine?
Rule: Always hand-wash or spot-clean your customized pieces.
Reason: Heavy machine agitators and hot water can degrade the sealant and cause the paint to chip over time.
What should I do if my leather paint starts peeling after a few wears?
Rule: Strip the affected area, re-prep, and repaint.
Reason: Peeling is almost always a sign that the factory finish wasn’t fully removed during the deglazing (prep) phase.
Do I really need to use a white base coat on dark jackets?
Rule: Yes, it is non-negotiable for dark fabrics.
Reason: Fabric absorbs medium. A white base coat acts as a primer, ensuring your top colors remain vibrant instead of muddy.
Conclusion: Launch Your First Bespoke Jacket Project
Transforming a blank garment into a wearable piece of art doesn’t require innate talent; it requires a proven process.
By strictly following the prep, execution, and sealing phases outlined above, you ensure your artwork lasts as long as the jacket itself. Beyond the art, the environmental impact is highly measurable. An upcycled secondhand garment reduces the carbon footprint by 82% compared to virgin purchases (ThredUp), and directly averts the 20,000 liters of water required for just 1kg of virgin cotton (WWF).
Execute this final checklist to guarantee project success:
Safety & Liability Disclaimer
The processes described in this tutorial involve the use of strong chemical solvents (such as acetone-based deglazers) and high-heat tools. Always work in a well-ventilated area, wear appropriate personal protective equipment (PPE) such as gloves and a respirator mask, and strictly follow all manufacturer safety instructions. The author and EcoCrafted are not responsible for any damage to garments, property, or personal injury resulting from the application of these techniques. Always test chemical products on an inconspicuous area first.